Special Aircraft Service

Please login or register.

Login with username, password and session length
Advanced search  
Pages: 1 ... 17 18 19 [20] 21 22 23 ... 32   Go Down

Author Topic: Thorneycroft Amazon WF/AC6/1/Coles Mk VII, series 2.  (Read 53513 times)

0 Members and 1 Guest are viewing this topic.

Flying H

  • member
  • Offline Offline
  • Posts: 1327
  • "And you can fly, high as a kite if you want to..
Re: Thorneycroft Amazon WF/AC6/1/Coles Mk VII, series 2.
« Reply #228 on: January 08, 2021, 11:05:49 AM »

@Mission_bug, don´t you think that it is a generator/alternator to provide power for the crane (if it´s electrical driven) or does the crane have it´s own engine? It seems mighty big to drive a waterpump.
Logged
And you can fly, high as a kite, if you want to.........

Mission_bug

  • Modder
  • member
  • Offline Offline
  • Posts: 5961
Re: Thorneycroft Amazon WF/AC6/1/Coles Mk VII, series 2.
« Reply #229 on: January 08, 2021, 11:46:26 AM »

@Mission_bug, don´t you think that it is a generator/alternator to provide power for the crane (if it´s electrical driven) or does the crane have it´s own engine? It seems mighty big to drive a waterpump.

To be honest I do not know, there are various motors inside the Coles cab under the panels that are attached to the crane cables and the winch, however, it is not clear from the photographs I have just what powers those, my own thought is that the Thorneycroft engine does that by transmitting power through other devices but how they are all connected is not clear. ;)

Unfortunately I do not have any documentation that helps me fully understand some of the items I am modelling, no drivers manual for instance to give any kind of clue and information on line is scant to say the least, without the photographs from the belfast restoration I would really be unable to detail this build as much as I have.


Take care and be safe.

Wishing you all the very best, Pete. ;D
Logged

Shessi

  • member
  • Offline Offline
  • Posts: 204
Re: Thorneycroft Amazon WF/AC6/1/Coles Mk VII, series 2.
« Reply #230 on: January 10, 2021, 04:12:48 PM »

Hi Pete,
I think FH is right, but it does not drive the water pump, it IS driven itself by the water circulation, another way of generating wiggly-amps, as almost everything on the crane is run off electrcity.

I don't know if you've seen this site and the associated downloadble free PDF's.  Interesting with a lot of historical info and pics, a few that explain the petrol/electrical cranes.  The guy who runs it, Tony, is email contactable, and he may be able to give detail on the various systems.

https://sites.google.com/site/colescranedatabase/home

Oh and a Happ-ier New Year to all...

Cheers

Shessi
Logged

Mission_bug

  • Modder
  • member
  • Offline Offline
  • Posts: 5961
Re: Thorneycroft Amazon WF/AC6/1/Coles Mk VII, series 2.
« Reply #231 on: January 11, 2021, 02:42:49 AM »

Hello Shessi, all the best to you and yours for this New Year, let us indeed hope it is better than the last. ;)

Thank you very much for the link, I have come across the link of yours before but not studied it extensively merely browsed quickly through so
I will keep it in mind and take a closer look at the details.

I think FH is right, but it does not drive the water pump, it IS driven itself by the water circulation, another way of generating wiggly-amps, as almost everything on the crane is run off electrcity.

As said earlier there are quite a few large motors on the crane itself but nothing obvious as a power source for them except the Thorneycroft engine so
understanding exactly how it all fits together for the layman is difficult.

Most working vehicles could be expected to have something that is clearly a power source for ancillary equipment but there is nothing like that for this vehicle,I would expect to see a box with mesh panels and a exhaust that would indicate a separate petrol driven engine for that purpose, maybe a closer examination of the photographs is necessary.

You would assume the crane would be self generated, able to turn the cab as well as lift the boom independently, there does not appear to be any connection
with the trucks drive shaft that I can tell, not even any power cables but electrical power as you point out must be the mechanism for working this beast.

Hopefully one day I will gain a full understanding of the vehicle, maybe a trip out to a vintage rally or even a journey to Belfast or one of the other museums
once the lock down can be lifted, for now I will continue to build, who knows I might finish it one day. :o

Take care and be safe.

Wishing you all the very best, Pete. ;D

Logged

Mission_bug

  • Modder
  • member
  • Offline Offline
  • Posts: 5961
Re: Thorneycroft Amazon WF/AC6/1/Coles Mk VII, series 2.
« Reply #232 on: January 12, 2021, 06:27:13 AM »

Hello again guys, just another brief update for you. ;)

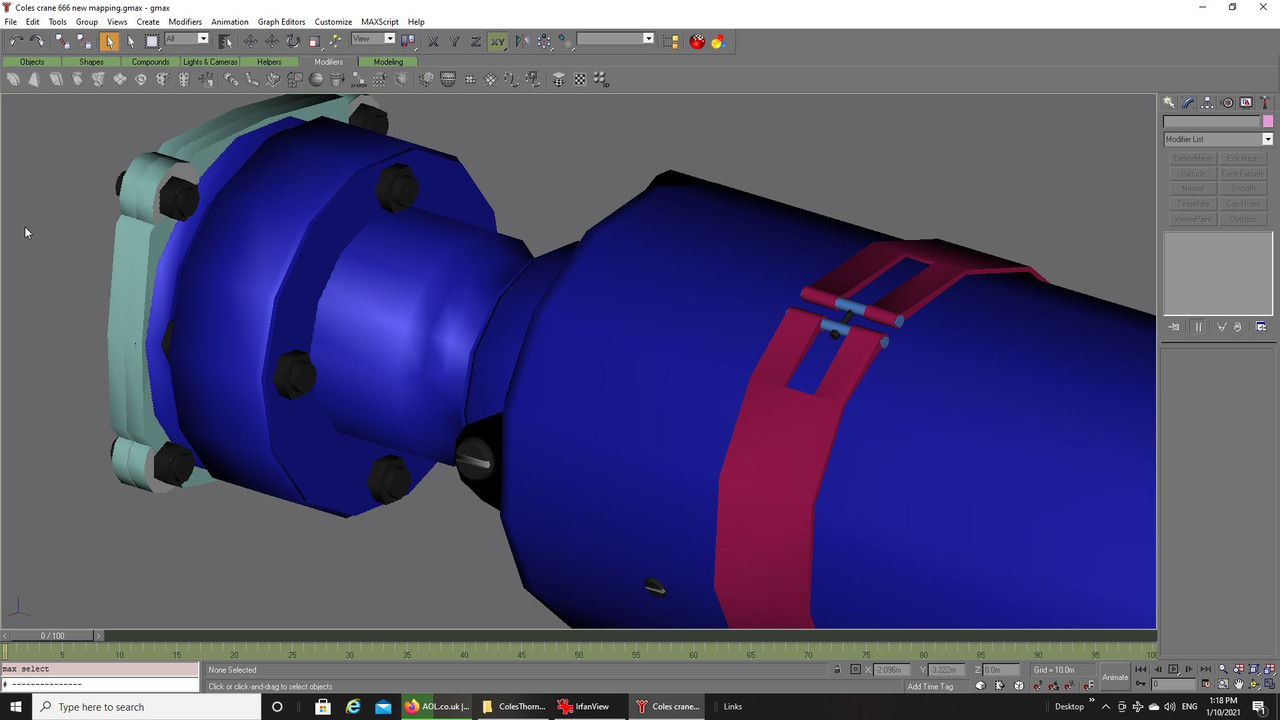
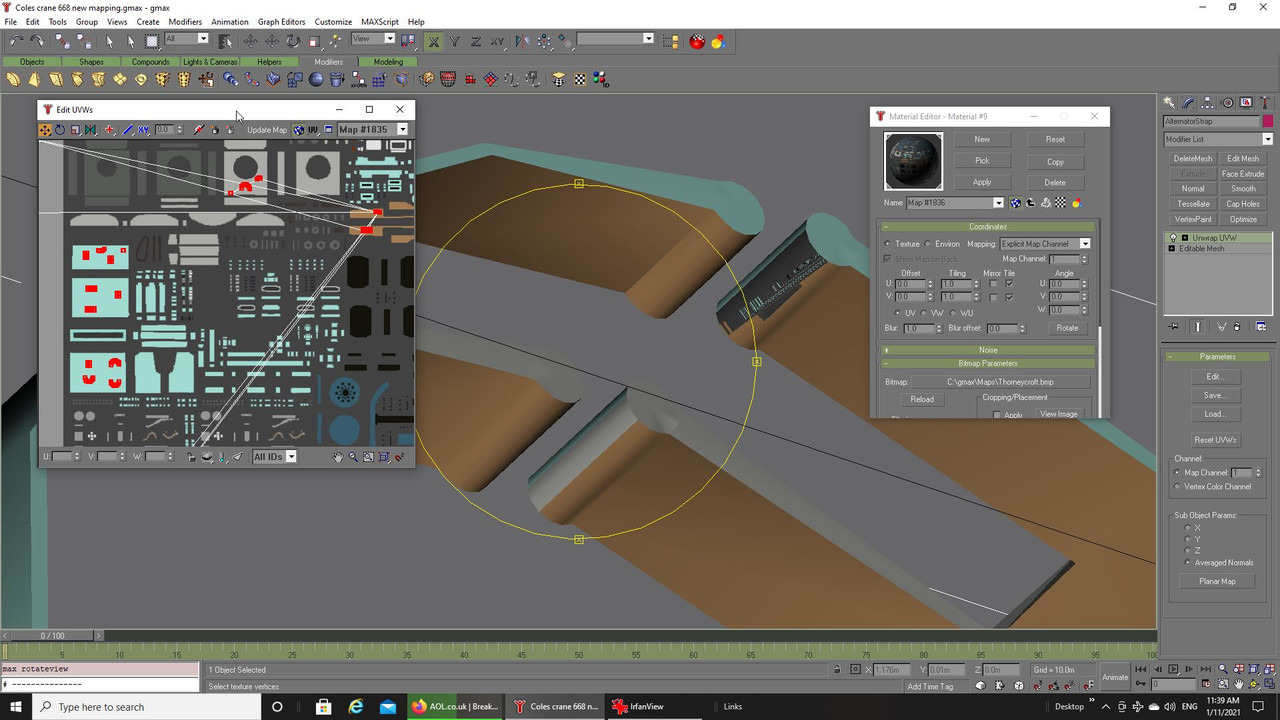
So, the various bolts and such that were cloned from other parts of the build and already mapped are
moved to new areas of the template, here we have their colours:


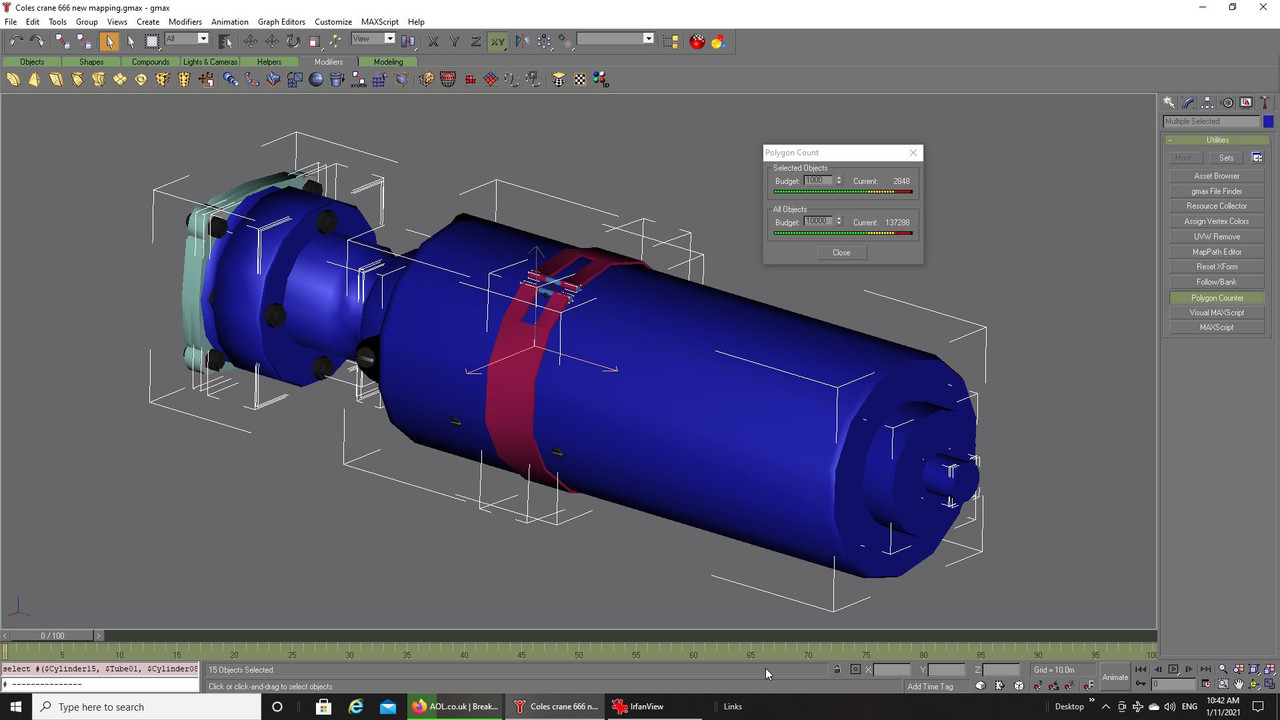
Thought I better do a quick poly check, wow, that soon got up to the individual mesh limit, better
leave things there and paint what I have so far:


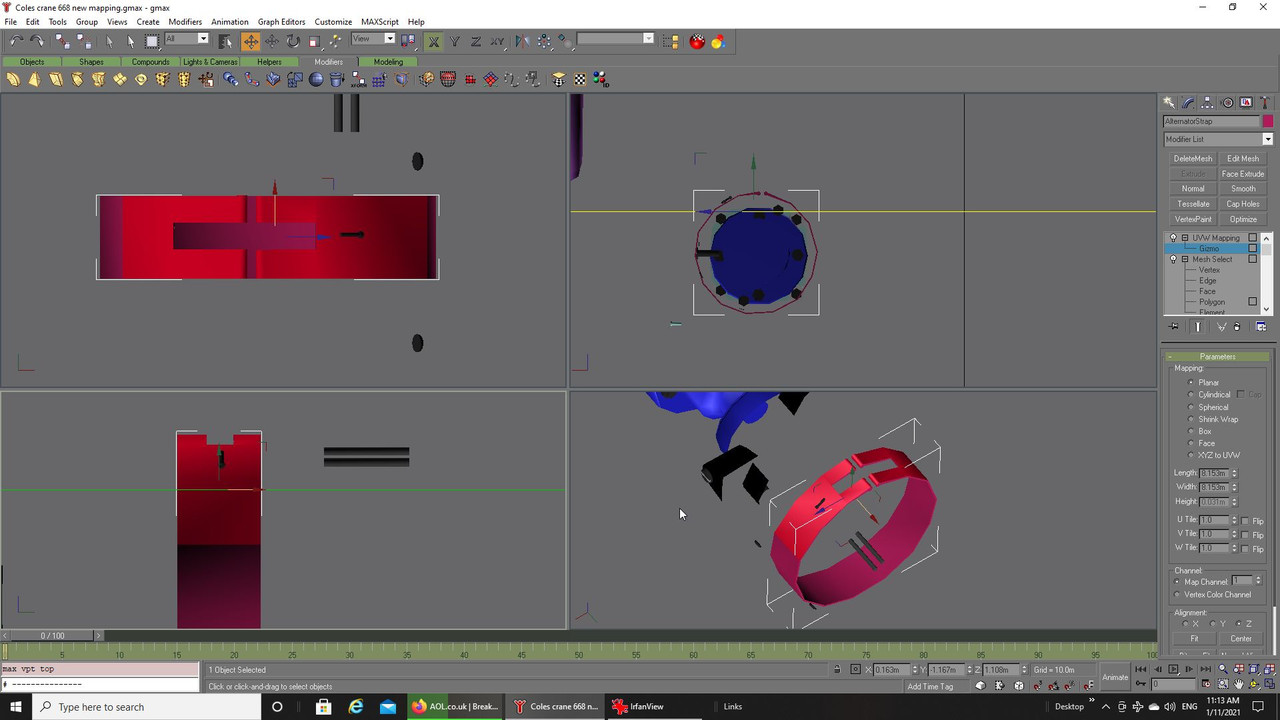
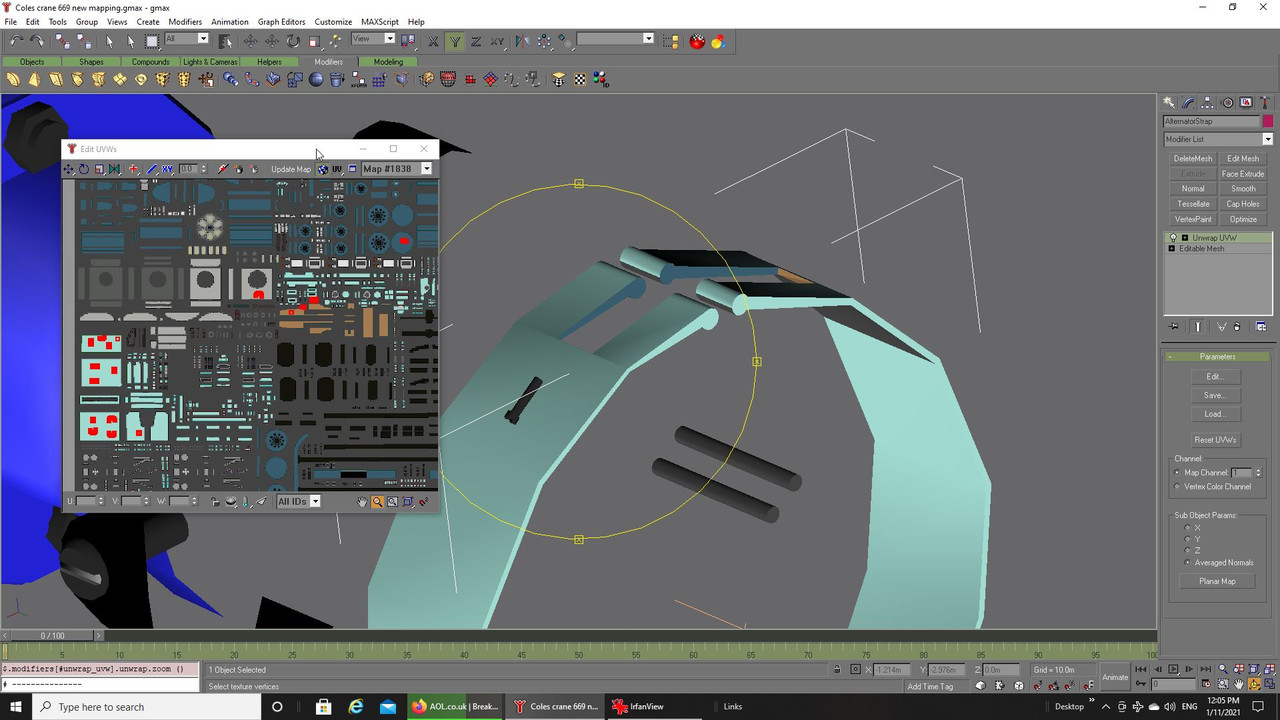
The new mapping for this part of the build begins with the strap to hold the alternator/generator, this will
be difficult due to the circular aspect of it and the need to have all sides done individually besides which
you have to consider the painting and whether there will be stretching so in this case I opted to break
the diameter down into smaller areas:


For what will be such a small object in the build you might ask why go to the trouble?  Well there is always
a possibility I will at some stage develop this in it own right and need to separate this particular part of the
build to a template of it own so I would rather do the work now just in case that eventuality comes about.

I think I have been through mapping a part with you before and if you compare my way to that of the guy
who put together the gmax tutorial, there is a link for around the site, you will be aware just how professional
his way is to mine and with good reason.  Mapping a part like this is quite involved and requires doing it in
pieces that all become joined in one whole after many combined stages so trying to remember just what you
mapped is difficult using my amateurish ways and can and will cause you problems.

What problems I here you ask?  Well, if you ever tried mapping and once done you found this when you went
to apply the texture then welcome to my world. :D


AAARRRRGGGHHHHH what the ***k I am sure was screamed out loud.

Now I would not advise turning to drink and drugs at this point, it can be fixed, not a complete loss, yet. o_O

Ignore my last statement, a drink will most likely help for what comes next. :o


The lines are a indication that a face/faces were missed during mapping, this is why our gmax guru numbers everything
very meticulously, with me though you get the idiot school of mapping. ::(

Okay, so how do you save the day?  First of all select a texture and and actually apply as you normally would collapsing
to actually bake things in so that the texture colours show on your mesh and save, please save a lot, it saves a lot of
pain during any 3d work:


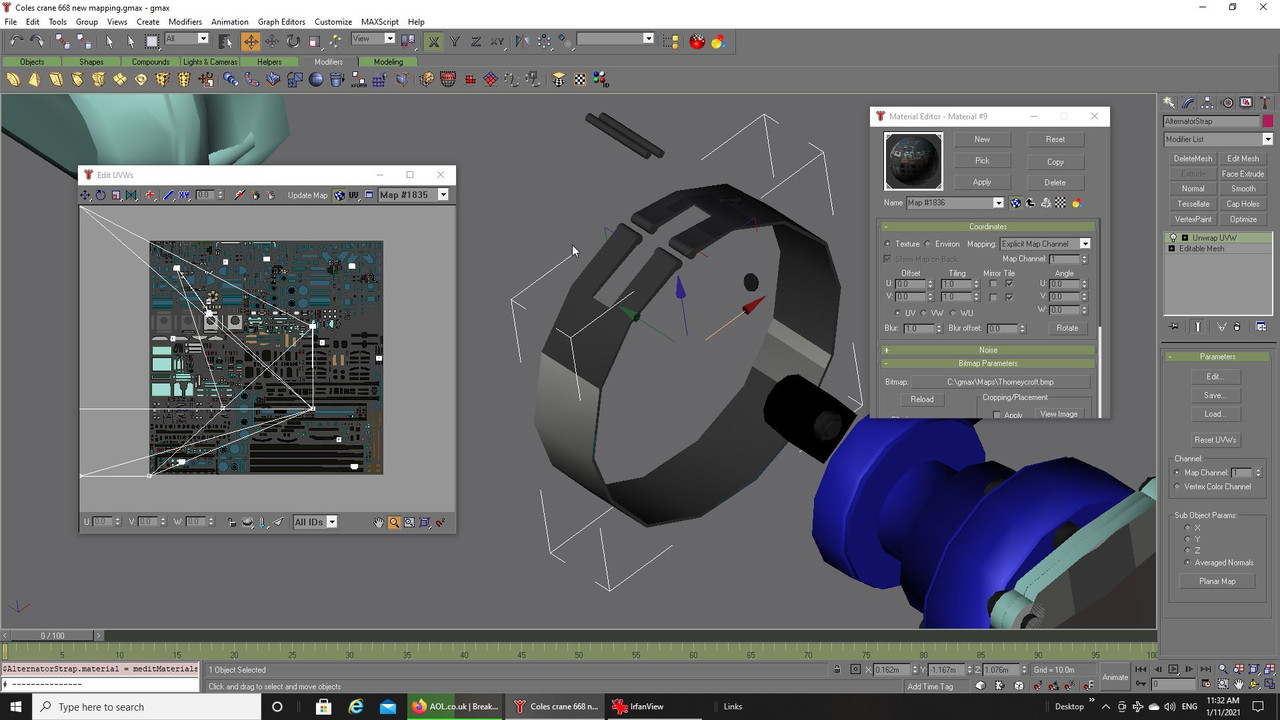
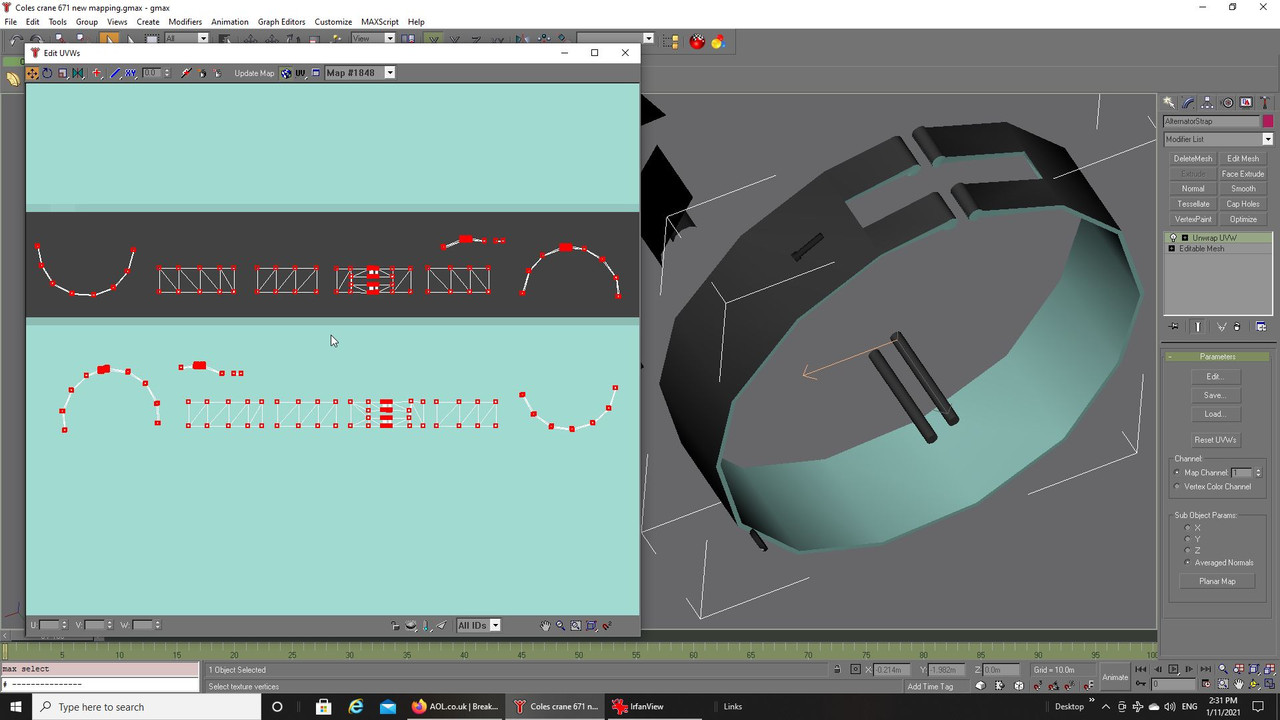
Next up you need to find where you messed up, to do this I select and group all the good mapping without connecting
lines onto a single colour and once that is done take each area joined by the lines to individual colours of their own:


This gives you a idea of what you are looking for, looks like one issue is while mapping the inner and outer of the
shape I forgot where they joined :-[


The way now is to take just one problem area and map it again, do not worry about what is already baked in for now
it will remain where you left the grouping, for the above it was the inner section at the top I did, one of four separate
segments that made up that diameter, the other two were okay.

By doing each stage at a time and collapsing as you go and re-applying the texture once you have the area done again
you will slowly but surely eliminate each problem area until all those linking lines are gone:


I ended with one face that could not be found for ages, I looked and looked to no avail but did eventually find it hiding behind
other faces, sometimes as you build and move things some vertices can be pushed together hiding part of a face and it really
can be a pain to find but persevere.


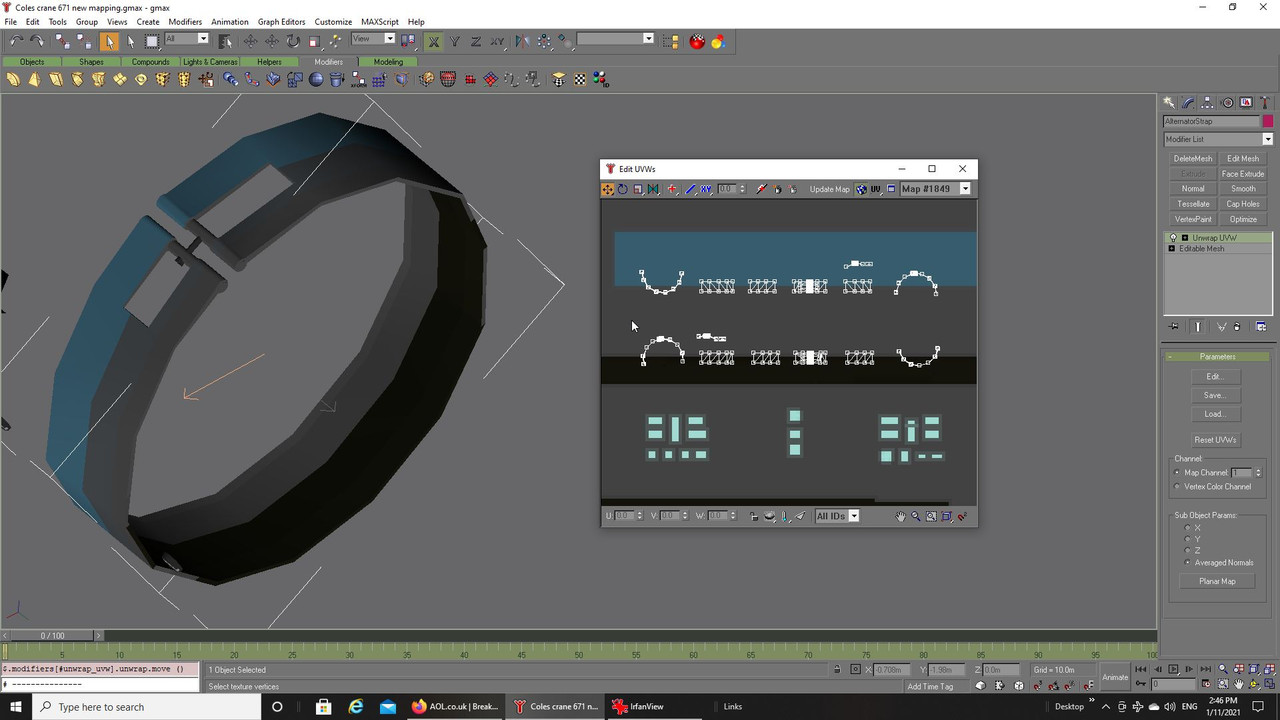
This is how all the now complete mapping for this part looks, you can see how it is divided up into segments:


Before I moved it to a permanent position of its own on the texture I aligned everything as best I could:


I know, a lot of faffing around but at least it is done. 8)


Hope that helps save some distress for your own projects, just to show it is possible to save work without
deleting and starting over. ;)


Take care and be safe.

Wishing you all the very best, Pete. ;D
Logged

Mission_bug

  • Modder
  • member
  • Offline Offline
  • Posts: 5961
Re: Thorneycroft Amazon WF/AC6/1/Coles Mk VII, series 2.
« Reply #233 on: January 18, 2021, 12:41:28 PM »

Hello again guys, just a little more of the ongoing work, no issues this time. ;)


Here is the painting so far of what my technical advisers, Flying H and Shessi, describe as the generator/alternator:


At the rear is a further clamping ring that holds in position the electrical wiring box but it is slightly different to the first so I
utilised what I could from the earlier one but cut out the fastener first:


From the photograph it was unclear just where the ring was open, what was clear is that the locking part seemed to be attached on
to the ring rather than be a part of it as before and there is a clasp of some sort that seems to actually hold the box to a new piece
of metal.  I began by filling in the part where I detached the locking part and mapped and attached it, I would later look at this again
and actually separate the two sections creating a smaller opening than previously.


Here we see the that second ring and the fill in section all mapped to another area of the template, it will
be properly positioned to a permanent area of the template later:


The new fastener has a larger threaded length that appeared to use a winged nut to tighten it up, previously
it was a screw with a cut out for the screwdriver head, I tried to replicate what I could see of this first:


A quick search online found a image of the wingnut/screw I needed to give me a good idea of the shape:


The part is fabricated in two parts, the wing uses the line tool to produce a shape and the body is
merely a cylinder with four lots of vertices adjusted with the size tool used to make the shape:


Here trying to align the build to where the finished part will finally attach:


The clasp to hold the box on, I assume under the box are two tongues of metal that would be offered up to
the clasp and inserted into it somehow before the clasp is pressed into place flat on the ring: 


As you see from the photograph quite how exactly is unknown, I make a lot of presumptions as you will have no
doubt noticed so all I can do is just make what I can see and hope for the best. :o


The work done and painted:


The length of the body has been bothering me through the build and so I finally shortened it using the mark one eyeball to get close,
never the best way I know but now I had the two rings it was easier, not as good as actual drawings but for our purpose it will have
to do. :D


Next up the box and its wiring as well as the bracket that holds this all to the engine block.


Take care and be safe.


Wishing you all the very best, Pete. ;D
Logged

Mission_bug

  • Modder
  • member
  • Offline Offline
  • Posts: 5961
Re: Thorneycroft Amazon WF/AC6/1/Coles Mk VII, series 2.
« Reply #234 on: January 24, 2021, 04:09:36 AM »

Hello again guys, onward we go. ;)


Next up is the wiring box for our generator/alternator.

I looked around the details built so far and decided I could use elements from the front casting re-sized
to save time building and mapping, did not quite go to plan but more further on:


The bottom of the box appeared more rounded than what I had so I took the side shape of the lid and made
a few copies that would each be reduced in size and stuck together:


Here we see the work in progress from the side:


Each piece is attached to the box and then the vertices welded together, a face also added to make
the bottom:


The new base shape is mapped anew:


All coming together with the parts put onto a new area of the template:


A new top was needed that required a new shape so work began using the line tool to rough out the shape:


This shape was further developed by removing each side and trying as best I could to replicate the curve
seen in the photograph:


The finished shape would need a clone rotated accordingly so a test was done to see how it looked:


All items are added to the template and checked to see all align, even though each will be a single colour
I try as best I can to make things match up just in case you need to add a stripe or some other such
adornment:


Now here came a problem, I had mainly been working from one image enlarged to construct so far, however,
when I went to check another image for something it was clear my box needed some alteration because
the wiring orifice was not just a pipe added on but actually seemed to be moulded into the overall shape:


Note to self: 

CHECK THE ****ING REFERENCES YOU HAVE MORE OFTEN TO BE SURE YOU
ARE CLEAR ON WHAT NEEDS TO BE DONE.


OooppS, Sorry, the equivalent of road rage for 3d mess ups. :-[


Okay, so I will need to alter what I have by trying to add further shapes, also the size of the box when viewed
from another image needs to be elongated and smaller, different images taken from altered viewpoints and
possibly with alternative lens type on the camera used can give quite a variance and the whole scene can
be very much at odds with each image. o_O

The next short session I spent altering the box at this stage before any further building work and re-mapped it
completely to account for the adjustments I had made to get close to what I needed and then again put things
aside yet again.


Anyway, crying over and left for another session off we go again to make well the mess:


The shapes proved troublesome but I now have something near enough:


Screws were added and mapped to the box and then all is set aside again until I can face mapping
the new shapes and attaching to the rest:


This part of the build seems to have kept throwing up issues in one way or another and has proved more
complicated than I imagined, I figured all the difficult stuff was done, wrong again as always, I will take a
few days away from it I think, time to make the dinner. :D

Take care and be safe.

Wishing you all the very best, Pete. ;D
Logged

Bison_M

  • Modder
  • member
  • Offline Offline
  • Posts: 1110
Re: Thorneycroft Amazon WF/AC6/1/Coles Mk VII, series 2.
« Reply #235 on: January 25, 2021, 12:16:06 AM »

Pete...
I repeat again: I am shocked by such detailization! o_O
Maybe it's time to move on to the position of chief designer at Thorneycroft? ;)

I wish you all the best! 8)
Logged
El sueño de la razón produce monstruos

Mission_bug

  • Modder
  • member
  • Offline Offline
  • Posts: 5961
Re: Thorneycroft Amazon WF/AC6/1/Coles Mk VII, series 2.
« Reply #236 on: January 25, 2021, 12:11:13 PM »

I repeat again: I am shocked by such detailization! o_O

Glad you like things so far Alex. 8) 

The whole idea of the build was to try and capture as much detail of the vehicle as my ability and 3d program would allow, so far I am quite
happy with the way it has gone considering how little in the way of detailed information I had, apart from the main body of the truck and crane
which I had a basic plan of the rest is just by reference to photographs using the main vehicle as a rough guide to size up each object added,
the photographs from the Belfast restoration have been invaluable. ;)


Maybe it's time to move on to the position of chief designer at Thorneycroft? ;)

Thankfully the world will be happy to know I do not have those qualifications, who knows what might come off the production line if I had tried. :P


Like most of the great engineering manufacturers of its day, Thorneycroft was amalgamated into various British companies as time past and is now sadly
no more but a distant memory, the last of its original factories closed I think in the late seventies, the global economy swallowed up what little was left
after our own domestic manufacturers had condensed into a few major outlets, foreign companies raped and pillaged what was left of many of our major
manufacturing entities for vehicles and trains and other things to the point we now barely offer anything other than production facilities that bring parts
made elsewhere. :( ::(

Many like me bare the illness caused by production line working where all that matters now is quantity, human robots man the lines, maybe it was always
that way but for someone born in the sixties I only saw the decimation onward from the 1980's.

Sorry, feeling a little down today, everything looks bleak.

Take care and be safe.

Wishing you all the very best, Pete. ;D
 
Logged

Bison_M

  • Modder
  • member
  • Offline Offline
  • Posts: 1110
Re: Thorneycroft Amazon WF/AC6/1/Coles Mk VII, series 2.
« Reply #237 on: January 26, 2021, 05:13:10 AM »

I repeat again: I am shocked by such detailization! o_O

Glad you like things so far Alex. 8) 

Sorry, feeling a little down today, everything looks bleak.

Take care and be safe.

Wishing you all the very best, Pete. ;D

Hi Pete! :)
Well, in my opinion, now feeling depressed is a normal state for many.
As in the film, sometimes it seems that "Groundhog Day" will last forever ... :(
But, there is a favorite SIM and it saves. ;)

Be healthy and take care of yourself!

I wish you all the best! 8)
Logged
El sueño de la razón produce monstruos

Mission_bug

  • Modder
  • member
  • Offline Offline
  • Posts: 5961
Re: Thorneycroft Amazon WF/AC6/1/Coles Mk VII, series 2.
« Reply #238 on: January 26, 2021, 06:00:18 AM »


Well, in my opinion, now feeling depressed is a normal state for many.
As in the film, sometimes it seems that "Groundhog Day" will last forever ... :(


Hello Alex, My illness has been ongoing since 2013, that and the current climate does indeed make it feel like "Groundhog Day" everyday, 24/7,
nothing the medics can do, I am stuck with pain, pills and poverty. ::(

I sometimes think tinkering with the Thorneycroft is all that keeps me going some days, sadly the pain can and does put a stop to that and limits it to small amounts of time, as for the game it is very rarely I take to the sky and if I do it is usually just to test updates such as those you provide, keeps me interested and helps me get through each day. ;)

That is the beauty of our modding sites, always something new comes out and regularly, plenty of new stuff and updates to tinker with even if only briefly. 8)

Take care and be safe.

Wishing you all the very best, Pete. ;D
Logged

Mission_bug

  • Modder
  • member
  • Offline Offline
  • Posts: 5961
Re: Thorneycroft Amazon WF/AC6/1/Coles Mk VII, series 2.
« Reply #239 on: February 03, 2021, 03:23:17 PM »

Hello again guys, yet another step along in the process comes together. ;)

I continually forget a small plaque on the front of the alternator/generator so I took a step back to do it:


Nearly there with a couple of studs to hold it in position:


All done, I am not going to try and engrave it, I will dirty it up with the weathering:


Back to the electrical box, the painting is now complete for what has been done so far:


With that completed the box was offered up to where it would sit and adjusted into place:


Adding the connectors for the wiring and the wires themselves both sides of the box:


The added bits were painted up and joined onto the box to make up the completed unit, this would comprise
the retaining ring/clip, box and wires, the poly count was too much to actually add this part of the build
onto the alternator/generator so they are separate units:


And at last into Il-2, seems to be a age since I last added anything, this part of the build certainly was
quite involved in effort and time:


I think I need a rest after that little lot. :D


Take care and be safe.

Wishing you all the very best, Pete. ;D
Logged
Pages: 1 ... 17 18 19 [20] 21 22 23 ... 32   Go Up
 

Page created in 0.077 seconds with 25 queries.