Special Aircraft Service

Please login or register.

Login with username, password and session length
Advanced search  
Pages: 1 2 3 4 [5] 6 7   Go Down

Author Topic: Mike's new project  (Read 20226 times)

0 Members and 1 Guest are viewing this topic.

whistler

  • Modder
  • member
  • Offline Offline
  • Posts: 2784
Re: Mike's new project
« Reply #48 on: May 09, 2018, 05:14:05 AM »

Very good job Mike, congrats. Now, where is the shopping cart button in this forum and will v2 implement leds? :P
Logged
NG-HUD v3.6.1 | NG-MAP v3.2 | NG-CAM v2.0 | NG-PAL v1.2: https://www.sas1946.com/main/index.php/board,93.0.html

SAS~Storebror

  • Editor
  • member
  • Offline Offline
  • Posts: 23588
  • Taking a timeout
    • STFU
Re: Mike's new project
« Reply #49 on: May 09, 2018, 06:27:11 AM »

Well the shopping cart...
Let me try to prepare a list of sample parts you need for this project.

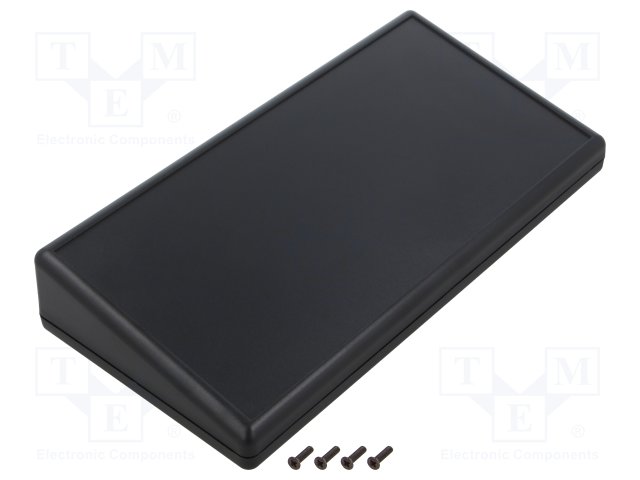
First there's the case. I chose a Hammond 1599HTSBK, but any other short slop enclosure will do as well, however mind the size - mine turned out to be pretty small for the number of buttons, switches and potis I've used: https://www.hammfg.com/electronics/small-case/plastic/1599t.pdf
My Desk case is available e.g. here: https://www.conrad.com/ce/en/product/485739/Desk-casing-220-x-110-x-40-Acrylonitrile-butadiene-styrene-Black?ref=searchDetail
It's actually the most expensive part of the whole list.


Then you need the Teensy Board - or any other Arduino one, if you are willing to follow my path of self-developing the whole software.
Note: There's full-featured tools like MMJoy2 out there, but they're limited to the purpose chosen by their designer, for instance my "two joysticks on one board" solution was not available anywhere.
And if you chose such ready-to-use tools, you need to have matching hardware.
MMJoy2 supported boards are listed here: https://github.com/MMjoy/mmjoy_en/wiki/Controllers-(compatible-base-boards)
My solution is strictly tied to the Teensy++ 2.0 (or Teensy 2.0, without "++", which is basically the same with less pins), which is supported by MMJoy2 as well, so for the moment, stick to that Teensy++ 2.0 to be on the safe side for both solutions.
Teensy 2.0 is available e.g. here: https://www.conrad.com/ce/en/product/1656375/PCB-design-board-Teensy20-Compatible-with-Arduino?ref=searchDetail
My Teensy++ 2.0 came from China, half the price for double the pins: https://www.ebay.com/itm/Teensy-2-0-USB-AVR-Development-Board-ISP-U-Disk-Experimental-Board-AT90USB1286/123112722663?hash=item1caa1710e7:g:6lcAAOSwn4da6sP0


While you can solder all wires directly to the Teensy, I'd recommend to use a perfboard so you won't damage the Teensy so easily, and in order to be able to plug/unplug it.
Any solder point grid board will do, e.g. this: https://www.conrad.com/ce/en/product/529580/WR-Rademacher-VK-C-811-2-Solder-Point-Grid-Plate-L-x-W-100-mm-x-75-mm-HP/?ref=no_search_results&rt=no_search_results&rb=1


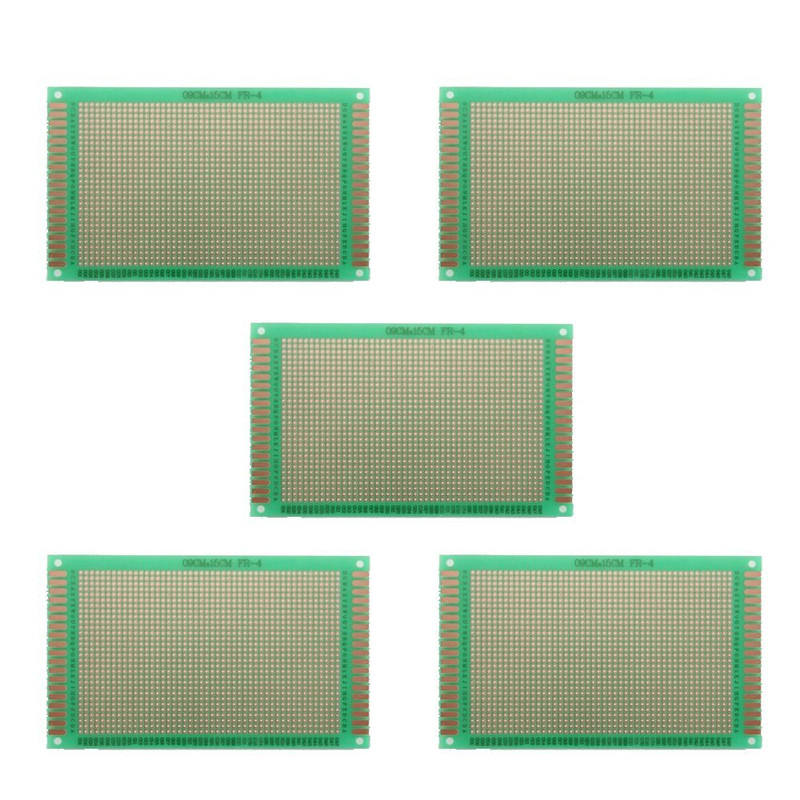
In order to be able to plug/unplug the Teensy, you need pins and sockets.
Two of these: https://www.conrad.com/ce/en/product/737416/W-P-Products-943-13-020-00-Multi-Pin-Connector-Number-of-pins-1-x-20-Nominal-current-details-3-A/?ref=no_search_results&rt=no_search_results&rb=1
...and either two of these: https://www.conrad.com/ce/en/product/738335/W-P-Products-153-020-1-50-00-Precision-Socket-Connector-Number-of-pins-1-x-20-Nominal-current-details-3-A/?ref=bundles&rt=bundles&rb=1
...or one of these: https://www.conrad.com/ce/en/product/183817/IC-socket-Contact-spacing-1524-mm-Number-of-pins-40-ASSMANN-WSW?ref=searchDetail


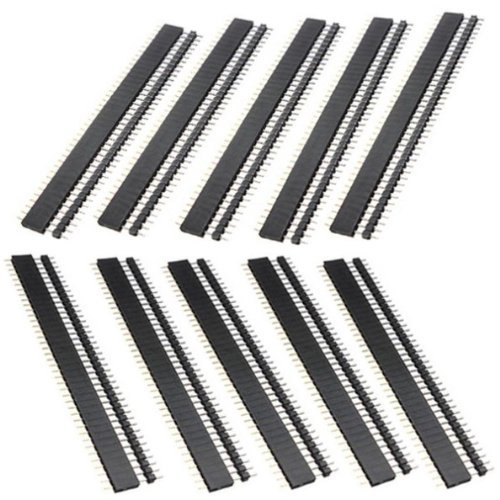
Now in my box there are 5 Potis like these: https://www.amazon.com/Uxcell-a15011600ux0235-Linear-Rotary-Potentiometer/dp/B01DKCUVMQ/ref=sr_1_3?ie=UTF8&qid=1525866955&sr=8-3
They need to have a nominal resistance of 10k Ohms, as that's the internal resistance of the Teensy's I/O pins.


Furthermore we have 10 toggle switches, I chose the "On/On" type so we can have button actions regardless the switch position:
https://www.amazon.com/Cylewet-Positions-Connection-Arduino-CYT1015/dp/B01MY309G3/ref=pd_sbs_263_15?_encoding=UTF8&pd_rd_i=B01MY309G3


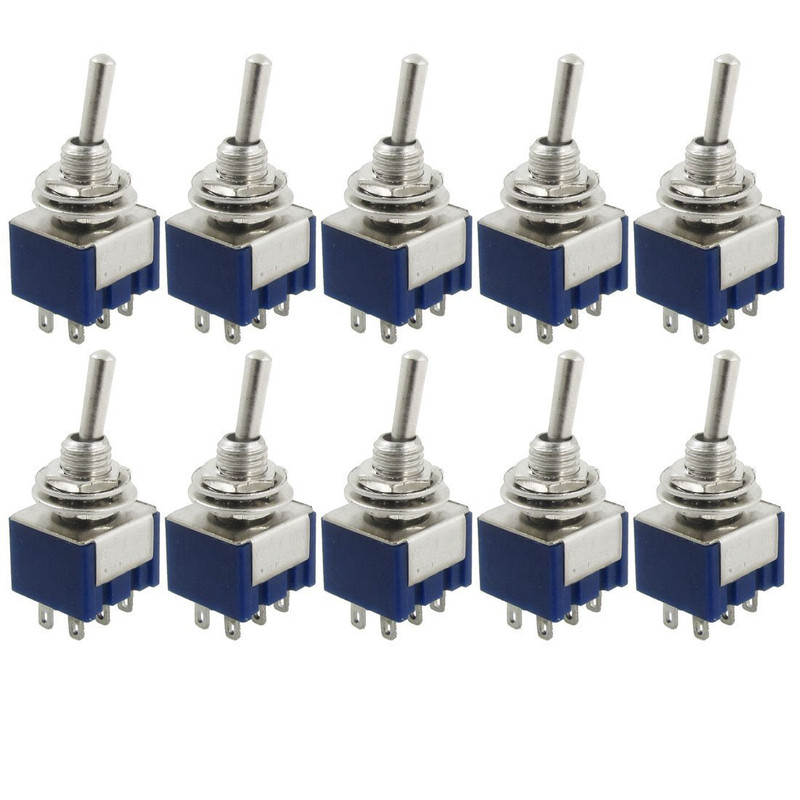
Another 10 of the momentary On/Off/On SPDT switches, e.g. for Trim Input:
https://www.amazon.com/SupportTM-Momentary-Miniature-Toggle-Dashboard/dp/B01LYGWWHA/ref=pd_sbs_469_1?_encoding=UTF8&pd_rd_i=B01LYGWWHA&pd_rd_r=MMP6MBFZBQ9KAEXAENVE&pd_rd_w=qtTNe&pd_rd_wg=17bLa&psc=1&refRID=MMP6MBFZBQ9KAEXAENVE


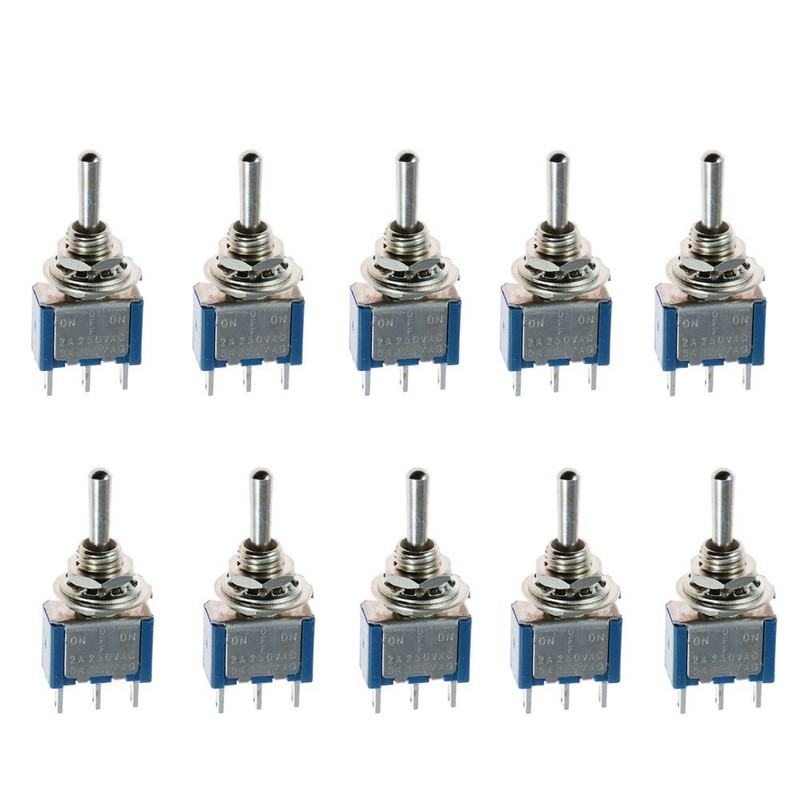
And the pushbuttons.
10 red: https://www.amazon.com/10pcs-Mini-Button-Momentary-Switch/dp/B01DWFPFA4/ref=sr_1_4?s=industrial&ie=UTF8&qid=1525867796
10 green: https://www.amazon.com/CynKen-Miniature-Momentary-Button-Switch/dp/B06WVCFNSN/ref=sr_1_41?s=industrial&ie=UTF8&qid=1525867828
10 yellow: https://www.amazon.com/10Pcs-Button-Momentary-Switch-Yellow/dp/B01DWFPGUI/ref=sr_1_4?s=industrial&ie=UTF8&qid=1525867845
10 blue: https://www.amazon.com/Exiron-PBS-110-Lockless-button-Switch/dp/B07CWXV9S9/ref=sr_1_19?s=industrial&ie=UTF8&qid=1525867887
and some spares, including white, black or anything else - you need one of these for reset at least: https://www.amazon.com/Cylewet-Momentary-Button-Switch-CYT1078/dp/B0752RMB7Q/ref=sr_1_10?s=industrial&ie=UTF8&qid=1525867975


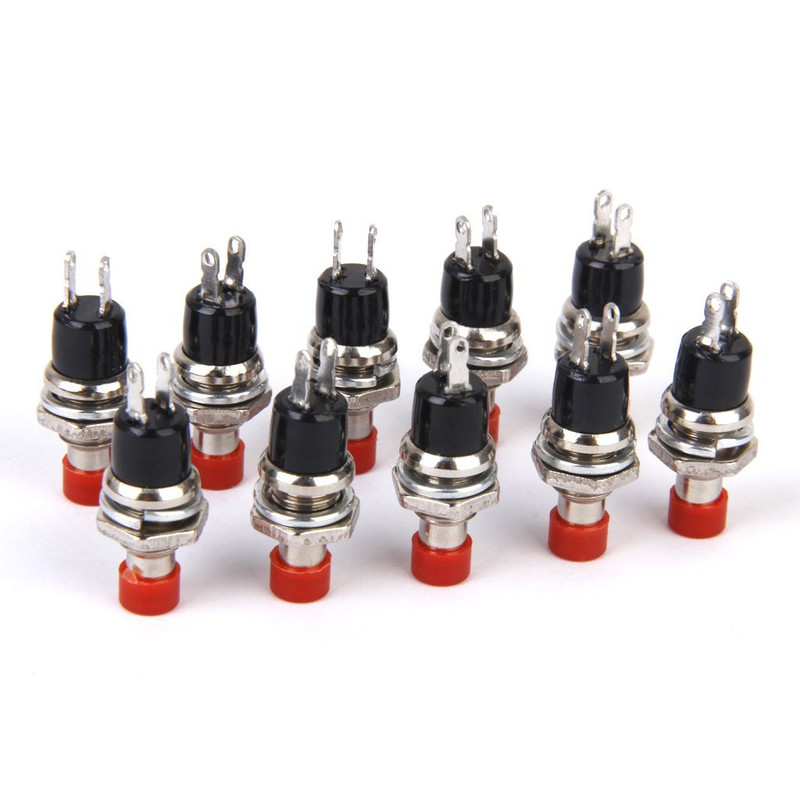
100pcs Switching Diodes. Use 1N4148, nothing else: https://www.amazon.com/100-1N4148-Switching-Signal-Diode/dp/B0714P3P6L/ref=sr_1_1?s=industrial&ie=UTF8&qid=1525868114


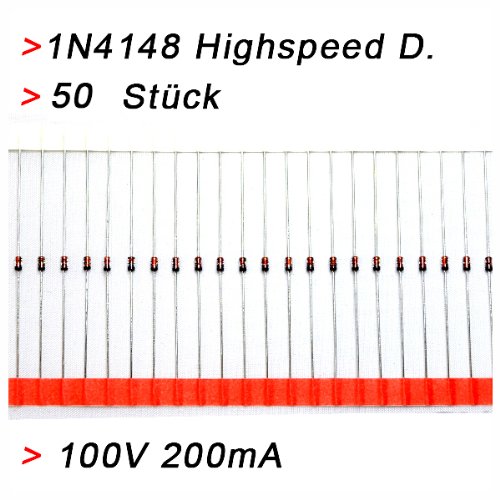
5 pcs 1µF Ceramic Capacitors for de-spiking Poti readouts: https://www.conrad.com/ce/en/product/1578616/Ceramic-capacitor-THT-1-F-50-V-20-?ref=searchDetail


1pc 10µF Elko for power supply buffering: https://www.conrad.com/ce/en/product/445656/Electrolytic-capacitor----Radial-lead--------25-mm----10-F----5/?ref=search&rt=search&rb=1


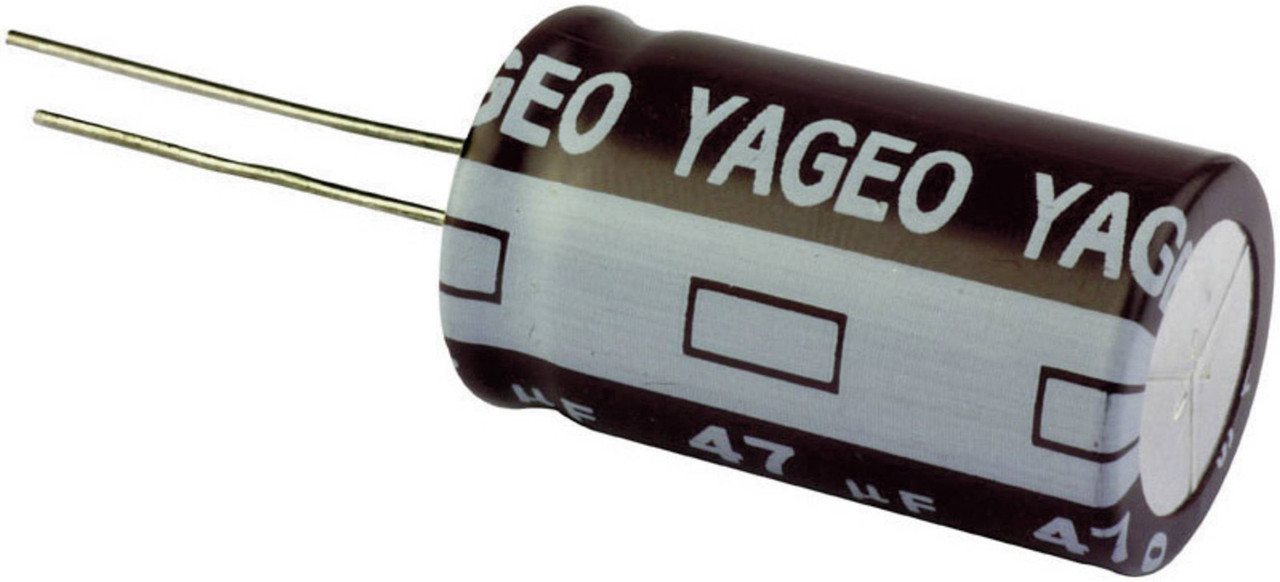
10 meters of wiring, at least: https://www.conrad.com/ce/en/product/1437297/Strand-1-x-004-mm-Red-BELI-BECO-L-10410-rot?queryFromSuggest=true


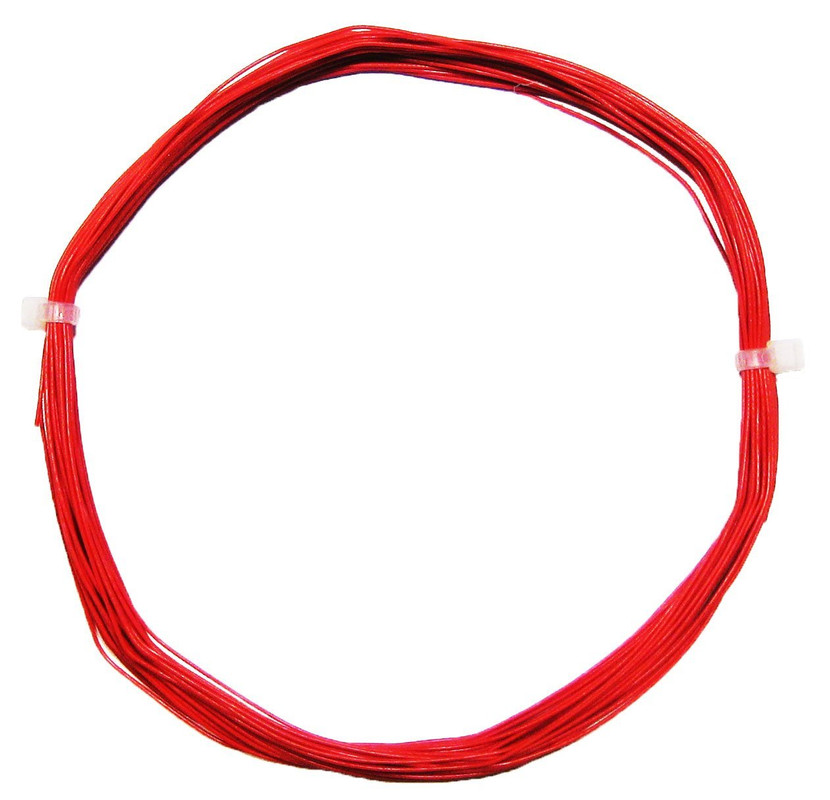
Some Bell wire for the collective row/column lines: https://www.amazon.com/Woods-0452-Bell-Wire-25-Feet/dp/B000UEAQ64/ref=sr_1_cc_2?s=aps&ie=UTF8&qid=1525868623

A Mini USB cable to connect your Teensy to the PC: https://www.amazon.com/Monoprice-10-Feet-mini-B-28AWG-103897/dp/B001UJE7FO/ref=sr_1_8?s=industrial&ie=UTF8&qid=1525868699

That's all folks.
I recommend to take a close look at some local shop.
While it's fine to order the Teensy from China (and this safes quite some money), I've finally ordered most of the smaller stuff (switches/buttons/diodes etc.) from local ebay dealers because the chinese stuff didn't always get through the customs and some of the parts were wrong, damaged, not in the right numbers etc. Better local than sorry.

Cheers!
Mike
Logged
Don't split your mentality without thinking twice.

whistler

  • Modder
  • member
  • Offline Offline
  • Posts: 2784
Re: Mike's new project
« Reply #50 on: May 09, 2018, 07:08:08 AM »

Oh, I meant if there were plans to produce more on demand! Thanks for all details

Resistors, capacitors, inductors... way beyond my understanding. I could solder it neatly and put it tidily together but half of the switches won't work, if any. Amperage, voltage... wouldn't know how to troubleshoot. The arduino boards are an awesome product, but you definitively need a good knowledge base to get anything interesting working. And then setting up the software... I'd rather pay but then, the joy when it all works.. that, is priceless.

Again, very good job, and thanks for having shared this project with us. I wonder why gaming switch panels are so rare and expensive, low demand sure but the components are cheap, firmware and software are out there. I guess facilities, personnel, patents, laws, licensing, packaging, marketing, warranties... get in the way. A home based startup would be the answer, just like the Ed Tracker Pro that I like so much.

Have fun with your toy!
Logged
NG-HUD v3.6.1 | NG-MAP v3.2 | NG-CAM v2.0 | NG-PAL v1.2: https://www.sas1946.com/main/index.php/board,93.0.html

SAS~Storebror

  • Editor
  • member
  • Offline Offline
  • Posts: 23588
  • Taking a timeout
    • STFU
Re: Mike's new project
« Reply #51 on: May 09, 2018, 07:37:08 AM »

Building this on demand is no option for me, as I simply don't have the time and shipping costs would be as much as it would take to build that thing on your own.
If anyone else wants to jump the train, be my guest and build this neat little thing.

Knowledge IMHO is not that much of an issue.
A soldering device for less than $10 would be enough.
You don't need to know how to program Arduino boards if you exactly rebuild my project.
The binary and the required loader are available. Start the loader, open binary file, push reset button on Arduino: Done.

Cheers!
Mike
Logged
Don't split your mentality without thinking twice.

LuseKofte

  • member
  • Offline Offline
  • Posts: 6937
Re: Mike's new project
« Reply #52 on: February 13, 2019, 03:53:19 AM »

For those wanting to buy good button boxes and throttles with them , there is a lot in the marked. Guys in the community that have made a little income. Like all devices buttons is probably the thing that increase price a lot.
Buy a Robinson helicopter setup and compare the price with a Huey setup. You will find the price to be up to 3 times higher. And only difference is amount of buttons.
That said, thank you Mike. Now visualize a guy that have wrecked his phone into a wall because a payment system did not work. (boy that did not make the payment cheaper)
For simplicity we call that guy me, I will read this topic 4 times more. But before I do I Need to ask one simple question that I could not read the first time.
Using the software like Joystick gremlin overcome the restriction of too many usb-card  connected for IL 2 to recognize?
Logged

SAS~Storebror

  • Editor
  • member
  • Offline Offline
  • Posts: 23588
  • Taking a timeout
    • STFU
Re: Mike's new project
« Reply #53 on: February 13, 2019, 05:00:44 AM »

I haven't ever been in the situation myself, so I can only answer half of the question, the other half you can probably answer better than myself.
What you can do with Joystick Gremlin is: You can map multiple Joysticks to one.
That way you can for instance turn two joysticks with two axis and 20 buttons each into one Joystick with four axis and 40 buttons.

The main issue with this is if you do so, in the example above where you've had two joysticks before, by adding Joystick Gremlin to the mix you will end up with having 3 Joysticks in your system.
The two physical ones plus the new "virtual" Gremlin device.
This is where you need to check yourself: With the limit of max. 4 devices in IL-2, can you select an arbitrary subset of 4 joysticks out of the <n> available ones on your system to use these arbitrary 4 in IL-2, or will IL-2 always pick the "first 4" it sees and use them?
If you have the choice of arbitrary subsets then everything's fine and you can use Gremlin to "group up" physical sticks.
If IL-2 always chooses the "first 4" then you're stuck here, because the Gremlin devices will come up in mixed order with the physical ones, there's no way to make all Gremlin devices to appear "first".

]cheers[
Mike
Logged
Don't split your mentality without thinking twice.

LuseKofte

  • member
  • Offline Offline
  • Posts: 6937
Re: Mike's new project
« Reply #54 on: February 13, 2019, 05:22:10 AM »

Problem is that it was always the rudder that was excluded, and when I rearranged the USB hub for switching off other usb cards they changed places and I had to reassign those USB devices all over again in other simulators.
I have to spend some time figuring out what to do, I miss old IL 2. Somehow SP in GB is plain boring and do not have the same atmosphere as old IL 2
Logged

SAS~Storebror

  • Editor
  • member
  • Offline Offline
  • Posts: 23588
  • Taking a timeout
    • STFU
Re: Mike's new project
« Reply #55 on: March 31, 2019, 01:53:42 AM »

Hi folks,

Blaubär decided to build the switchbox and on that occasion I had to realize that I forgot to post a couple of updates, including a very important one.

This is the new circuit diagram, click for scalable SVG vector graphic.
Note one important change: Pin D6 "6_LED" is not used for inputs anymore. The reason is that due to the onboard LED of the Teensy, this pin cannot reliably be used as INPUT_PULLUP pin.


The full set of project files can be found for download here:
Mike's Controller Box v2

It includes a few changes to the program files, mainly for further handling of potentiometer readout spikes and bouncing buttons.
Precompiled Hex file is included.
If you don't want to program using Arduino Tools yourself, these are the steps to get your board started:

  • Extract the files from the zip archive
  • Navigate to the "Teensy Loader" folder and run "teensy.exe"
  • Click the very right Icon "Auto" and make sure it's bright green:
  • Click "File" -> "Open HEX File"
  • Navigate to the "Teensy Sketch" and load the hex file (the current name is "Mike_s_Controller_Box_v002.ino.hex")
  • Attach your Teensy++ 2.0 board via USB (if not done before already)
  • Press the Reset button on your Teensy.
  • Programming should start automatically, Teensy will reboot after a second or two and then you will see two Game Controllers in Windows, both named either "Mikes Switchbox Dev_1" or "Mikes Switchbox Dev_2".

Cheers!
Mike
Logged
Don't split your mentality without thinking twice.

Blaubaer

  • member
  • Offline Offline
  • Posts: 514
Re: Mike's new project
« Reply #56 on: March 31, 2019, 03:38:03 AM »

Let's have a big hand for Mike! Thanks for the cool switchbox with 80 buttons/switches and 5 rotary potentiometers. (The inscription is still missing.)

Regards, Michael

Logged

W0W66

  • member
  • Offline Offline
  • Posts: 236
Re: Mike's new project
« Reply #57 on: March 31, 2019, 08:30:01 AM »

This looks awesome.  Well beyond my abilities, but, looks like it is well worth a try.

Thanks for posting this.
Logged

sniperton

  • member
  • Offline Offline
  • Posts: 1226
Re: Mike's new project
« Reply #58 on: March 31, 2019, 01:30:23 PM »

Jesus, you must have exceptional muscle memory, this thing has as many buttons as an ordinary laptop keyboard. How can you remember and correctly locate the proper button or switch blindly and using only your left hand fingers? Just curious  :D
Logged

SAS~Skylla

  • SAS Team
  • member
  • Offline Offline
  • Posts: 1951
  • Flying Ass Clown N°24
Re: Mike's new project
« Reply #59 on: April 01, 2019, 02:55:34 AM »

I suppose he is going to label them.
At least I would do so ;)

But aside from this, after having to look at the labels for a while I would certainly expect to find the right button "blind" at some point.

Anyway, congratulations Blaubär!
Logged
When all else fails: read the instructions!
Pages: 1 2 3 4 [5] 6 7   Go Up
 

Page created in 0.083 seconds with 24 queries.